Google Search

Custom Search

Powered by...

Find us on Facebook

Saturday 13 February 2016

Fibaro dimmer 2 installation Home Automation (Vera)


Today I installed a Fibaro Dimmer 2 module for my living room ceiling lights, so I took some photographs and thought I’d do a blog write up.

The Fibaro Dimmer 2 is a small wireless Z-Wave module that is installed behind light switches to make them “smart”. We can then control the lights wirelessly in the home automation system.

This will enable us to control the lights via our smart phones and tablet devices using the ImperiHome mobile app. We can then also setup scenes and schedules to have the lights automatically come on and off at certain times if we wish, or to simulate house occupancy when we are away.

Another function with scenes for example, could be if a Z-Wave smoke or C02 sensor was triggered in the night we could have the scene automatically turn on the lights to aid our escape or another example might be if our burglar alarm scene was tripped in the night we could also automatically turn on the lights inside and outside of the house when this happens.

Image result for fibaro dimmer 2
The Fibaro Dimmer 2 user manual can be found here


Supported Loads

As a dimmer it operates under the following loads:
• 230V operated conventional incandescent and halogen light
sources
• 12V operated ELV halogen lamps and dimmable LED bulbs (with
electronic transformers)
• 12V operated MLV halogen lamps (with ferromagnetic
transformers)
• dimmable LED bulbs
• dimmable compact fluorescent CFL tube lamps
• supported dimmable light sources (power factor > 0.5) with
minimal power of 5VA using FIBARO Bypass 2 (depending on the
type of load)


Without dimming function it may work with:
• compact fluorescent CFL tube lamps with electronic ballast
• fluorescent tube lamps with electronic ballast
• LED bulbs (power factor > 0.7)
• supported light sources (power factor > 0.5) with minimal power
of 5VA using FIBARO Bypass 2 (depending on the type of load)

I am using a light fitting that has a 240v –> 12v transformer built in to it and I am using 4x new MR16 ECO low energy 14W halogen bulbs.

The Fibaro Dimmer 2 has a minimum load of 50W. So my 4x 14W halogen bulbs are 56W total, which is OK as I am over the 50W minimum. However if the total of your bulbs wattage is less than 50W, perhaps you are using low wattage LED bulbs, then you will also need to also install a Dimmer Bypass 2 as well. I’d say its probably best to install the Bypass 2 device as a matter of course anyway.

Image result for fibaro dimmer 2 bypass


“The Fibaro Dimmer Bypass 2 acts as an intelligent load in the lighting circuit and will help prevent the LEDs flickering at startup, low dim settings or when they should be Off. The dimmer bypass should be installed in one of the light fittings or in the wiring going to the light fitting, it must be connected between the light's Live and Neutral wires. You only need one Dimmer Bypass 2 for each circuit (not for each light bulb).”

There are several excellent application notes from the guys at Vesternet about the Dimmer 2:
Here is my ceiling lights in the living room.

image

I took it apart to take a closer look at the inbuilt 240v –> 12v transformer

image

I didn’t install a Bypass 2 as my bulb wattage total was over 50W and I don’t plan to use LED bulbs anytime soon.

For the Fibaro Dimmer 2 module to fit behind the light switches I recommend using 35mm back boxes. I also recommend replacing your existing light switches with 3-position momentary, or retractive, switches, these have 3 positions and are also known as an ON/OFF/ON switch.
Why use a 3-position Switch
This type of switch provides another way of controlling the Fibaro Dimmer 2 (and the light it is connected to):
  • Top ON
    • Press once and release - turns light onto full brightness or previously set dim level
    • Press and hold - increases brightness, releasing it keeps the lamp at that brightness
  • Bottom ON
    • Press once and release - turns light off
    • Press and hold - decreases brightness, releasing it keeps the lamp at that brightness
Installation and Configuration
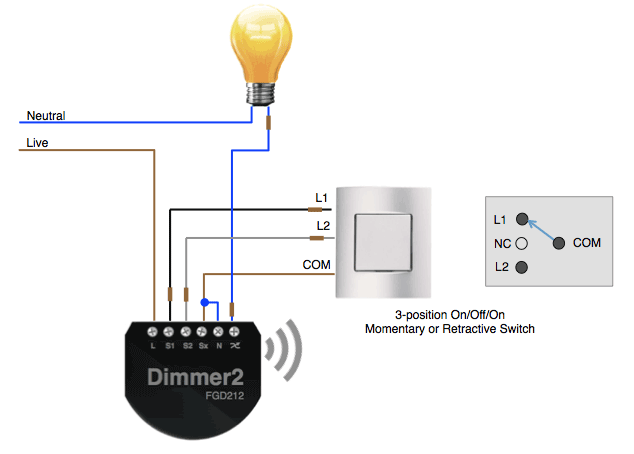
The switch and Dimmer 2 module can be connected to the lighting system as follows.

Using a 3-Position Switch with a Fibaro Dimmer 2

Using a 3-position switch with a Fibaro Dimmer


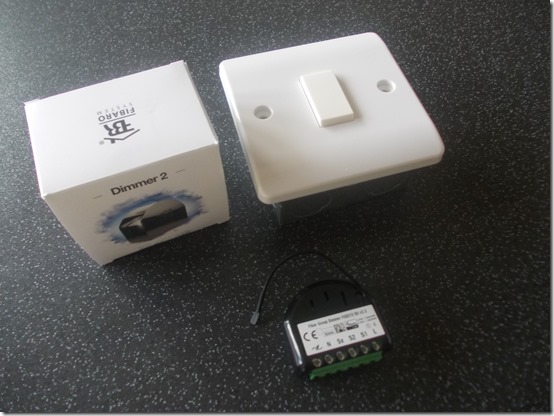
I wired up my Fibaro Dimmer 2 as per the wiring diagram above. I am using the Scolmore Minigrid 3 position momentary switches.

DSCN0733


DSCN0734


DSCN0735


Here you can see the Fibaro Dimmer 2 module

DSCN0736


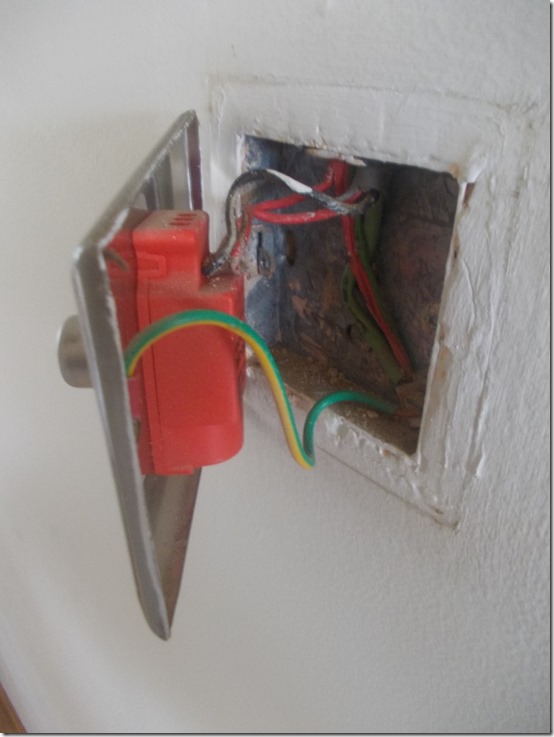
Here is my orginal bog standard dimmer switch minus the screws which I had already took out.

DSCN0730


Most UK light switch back boxes are likely to be only 16mm deep, so this means you will need to replace the back box with a deeper 35mm one.

Or you can buy light switch spacers to bring out the light switch away from the wall and then give you more space behind, but I am not keen on that look.

Here is the existing dimmer switch wiring, the wiring in my house is quite old done when the house was built in the 70s. Most UK light switches are a 2 wire system with no neutral.

The Fibaro Dimmer 2 module however supports both 2 wire and 3 wire systems.

DSCN0732


I turned off the electric at the consumer unit for the lighting ring and disconnected the original dimmer switch.

DSCN0738


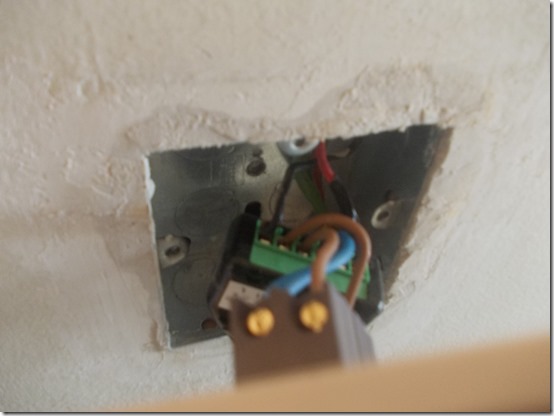
I then proceeded to remove the 16mm back box, unfortunately I rushed this a little and some of the surrounding plaster work came away. I am sure if you take your time and are more careful than I was you can remove the back box with less damage.

DSCN0741


I then proceeded with the hammer and chisel to knock out the block work deeper to fit the new 35mm metal back box.

DSCN0743


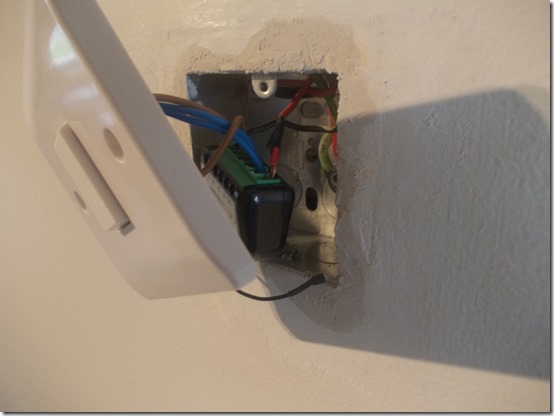
Next I started connecting the Fibaro Dimmer 2 module and the new Minigrid switch.

DSCN0744


DSCN0745


Once wired in I applied my first lot of wall filler to fix the holes I had made.

DSCN0747


I will later sand this down and apply a second lot of filler to make the job nice and neat and then use a little more white paint to finish.

DSCN0748


You then need to pair the new Fibaro Dimmer 2 to the Vera home automation controller, I won’t cover how to do that here as its pretty standard stuff.

Once paired I then had 3 new devices in the Vera web GUI, two are child devices which I will hide from the GUI later as they are not needed. I renamed the main parent device to “Lounge Lights”.

image


When the Fibaro Dimmer 2 module is first powered on it runs an auto calibration routine to work out what type of lighting system / bulbs are in use and to automatically configure the minimum and maximum brightness levels.

In the device options I had to to set parameter 20 to 1 byte Dec with a value of 2. This tells the Dimmer 2 I am using the 3 position momentary type of light switch and sets it up in that mode etc.

Also you can add paramaters 1 and 2 to see the minimum and maximum brightness levels detected by the calibration routine. Mine were 1 and 82.

image


If you wish you could for example set parameter 2 to 70, so that when the light is on 100% in the GUI it is actually only using 70% brightness, this is another way to save yet more energy
consumption.

image


In the end after playing around with these parameters for a while I finally set parameter 2 to 80.

Here are the device controls in the Vera UI7 web GUI.

image


image


I then added the device in to the ImperiHome mobile application on all of our smart phones and tablet devices.

image


Summary

The Fibaro Dimmer 2 is a retro fit wireless Z-Wave lighting controller and is an essential part of any Z-Wave home automation installation. They make your home lighting “smart” and gives you the home owner added benefits of energy saving, security and control.

Fibaro RGBW mood lighting with Vera Home Automation

Recently I setup a Fibaro RGBW module with the existing LED strip lights behind my wall mounted TV in the living room. The Fibaro RGBW module is a wireless Z-Wave LED controller and works with Home Automation controllers such a Micasaverde Vera, Fibaro Home Center 2, Zipabox, Homeseer, Indigo, Domoticz, SmartThings.
“The Fibaro Z-Wave RGBW Controller enables you to bring multi-colour LEDs to life, allowing you to have just the right light effect for your mood.

The Fibaro RGBW Controller is a unique, advanced wireless 4-colour LED strips controller. As well as supporting the traditional RGB channels, it also supports the additional white light channel - allowing an infinite variety of pastel colours. The controller also provides dimming control of four LED channels and can take input from up to four analog sensors.”


Wiring was simple, the user manual can be found here.

image

I just used a small LED driver power supply behind the TV and connected a plug wire on to it, this then plugged in to the double mains socket behind the TV and the 12 volt +/- output from the power supply connects to the 12v / GND on the Fibaro RGBW module.

The 12v wire from the LED strip tape then also goes to the 12v on the Fibaro module and the colour channels go:
  • Red –> Red
  • Green –> Green
  • Blue –> Blue
  • White –> White
image

I am not actually using LED tape with a white channel so this remained unused. I am using bog standard RGB SMD 5050 300 LEDs Waterproof Strip, easily found on eBay, Amazon and Aliexpress etc.
Read my previous article about how I made up the LED loom for behind my wall mounted TV here.


Once the wiring was completed it was time to pair the new Fibaro RGBW module in to the Vera home automation controller. I am using a Vera Edge UI7 unit and below are the step by step instructions from Vera support on how you should pair the module.

In order to include your device on Vera , please try to follow the standard steps below:
- Bring your device within 3 feet from your Vera Controller.

- Afterwards access your Vera Web Interface ( Dashboard ), click on Devices > Add Device > Other Device > Other ZWave device, click on the step 3 ( in the right side of the page ) then click on Retry button.

-Your unit will be into exclusion mode, in the status bar you should see the this message: “Add/Remove : Remove devices now…”, after then follow the steps on your device for exclusion process according the owner guide.

-Then automatically the status bar should be: “Add/Remove : Add new devices now…” if not so, click on “Try adding it again” to put your unit into inclusion mode, the status bar should be changed into: “Add/Remove : Add new devices now…” and then follow the steps on your device for inclusion process according the owner guide.

Then give a name to your device and click on the Finish button.

Where they say “follow the steps on your device for inclusion process according the owner guide” you just press the B button on the Fibaro RGBW module quickly 3 times.
The new device(s) are then added in to the Vera controller web GUI and you end up with 6 new devices. Unfortunately I forgot to take some screen shots of the devices before I renamed them and moved them in to the lounge room, but basically you get the main parent device a child device which is used as a dim all channels function and then a device for each of the colour channels RGBW.

You now need to rename these devices so they make more sense, to do this I moved all the dimmer sliders down from 100% to 0% then one by one on the child devices that are for the colour channels, move the slider up to 100% and watched the LED lights to see what colour they went? If Red for example rename that device “RGBW – Red Channel” or if the lights went Green, name it “RGBW – Green Channel” etc.

This is how the renamed devices look like in Vera UI7 on my system. RGBW Dimmer is the child device of the parent device and is the dim all functionality.

image

I named the parent device RGB Controlller.

image

Tip:-

Decide if you want to actually hide the individual colour channel child devices from the Vera web GUI? I haven't done this yet, but I will probably hide all of the individual colour channel child devices and just keep the main parent device for the Fibaro RGBW Controller, the child device for the Dim all functionality and the device for the RGB Controller Plug-in, more on that later.

Startup Lua example:

luup.attr_set("invisible","1",134) 134 is the device ID you want to hide etc.

End of Tip

Now by default its seems that you won’t see that colour picker box in the screen shot above and it will be missing. This is a newish native feature of Vera UI7 and it needs to be enabled by making a few changes to the main parent device.
Click on the arrow of the parent device and go to Advanced.

In the device_file field and in the device_json field which can be found further down the page you need to replace the following text:

In the device_flle field change -
D_DimmableLight1.xml to D_DimmableRGBLight2.xml

In the device_json field change -
D_DimmableLight1.json to D_DimmableRGBLight2.json

image

So those fields should now look like this:

image

Then go to the Commands tab and press the Configure node right now button.

 image

After this you should now have the native Vera RGB support and be able to see the colour picker box on the parent device. Pick a colour and then click the Choose button and the LEDs should change to that colour you just selected.

You can also use this colour picker box in scenes, so you could have a scene run and select a particular colour to then be displayed.

image

Congratulations you have now setup the native Vera RGB support for your Fibaro RGBW module, however there is more, as always 3rd party developers seem to do things better and there is a plug-in for Vera called “RGB Controller” by installing this plug-in we can gain even more functionality such as a colour wheel picker and support for the Fibaro RGBW modules inbuilt aimations / programs more on that later.

In the Vera UI7 web GUI go to APPS –> INSTALL APPS and search for “RGB Controller”

Now I already have the plug-in installed but you would select to install the plug-in from this area etc.

image

Once the plug-in has been installed you should see a new device called “RGB Controller” I believe it was called. I renamed this plug-in device to “RGBW - Colour Wheel”

image

Now you need to link the new RGB Controller plug-in device to the actual Fibaro RGBW Controller parent device. So you need to know what is the device ID number of the Fibaro RGBW Controller parent device? In my case its #128

image

Keep this number in mind and now open up the new RGB Controller plug-in device and go to the Settings tab. Under Device type select the “Fibaro RGBW Controller” and press Save.

image

Now for some reson the second drop down box called “Controlled Device” didn’t seem to work for me and was empty. so instead go to the Control tab – Advanced – Variables and scroll down to the field called Deviceid and enter the device ID number of the parent Fibaro RGBW Controller device, in my case #128

image

This should then have setup and configured the RGB Controller plug-in deivce to be able to control the Fibaro RGBW Controller parent device etc.

Now this is where the fun stuff starts !
You can now go to the Colour Wheel tab and you select a colour first on the wheel / circle, then in the square box in the middle, you select a shade of that colour and the LED lights will then change to that colour.

image

If you are using the ImperiHome mobile app for Vera you will be pleased to know that this colour wheel functionality is then also avaiable in the app.

image

The Fibaro RGBW module has 5 predefined animations or programs they are called:
  • Fireplace
  • Storm
  • Rainbow
  • Aurora
  • LAPD
These are animations for example the Aurora animation slowly fades through the colours and the LAPD animation looks like police lights flashing which I have now used in my burglar alarm scene.

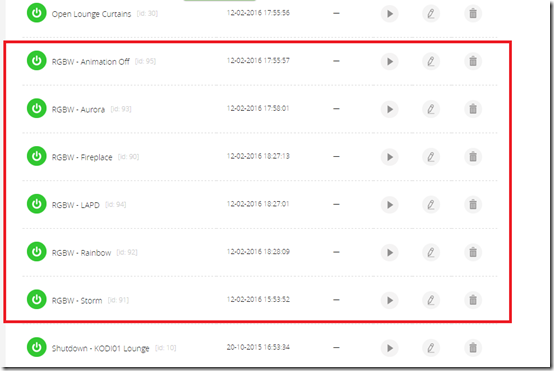
In order to utilise these inbuilt animations, I created 5 new scenes in Vera with a single line of LUA code in each to start each of the ainmations. The deviceid you can see in the code below of 139 should be the device ID of your “RGB Controller” plug-in device what ever device ID number has been assigned to it.

RGBW - Fireplace
luup.call_action("urn:upnp-org:serviceId:RGBController1","StartAnimationProgram",{ programId="6" },139)

RGBW - Storm
 
luup.call_action("urn:upnp-org:serviceId:RGBController1","StartAnimationProgram",{ programId="7" },139)

RGBW - Rainbow

luup.call_action("urn:upnp-org:serviceId:RGBController1","StartAnimationProgram",{ programId="8" },139)

RGBW - Aurora
 
luup.call_action("urn:upnp-org:serviceId:RGBController1","StartAnimationProgram",{ programId="9" },139)

RGBW - LAPD

luup.call_action("urn:upnp-org:serviceId:RGBController1","StartAnimationProgram",{ programId="10" },139)

I then created a sixth scene to stop the animations.

RGBW - Animation Off
luup.call_action("urn:upnp-org:serviceId:RGBController1","StartAnimationProgram",{ programId="0" },139)
Here you can see my new scenes in the Vera UI7 web GUI

image

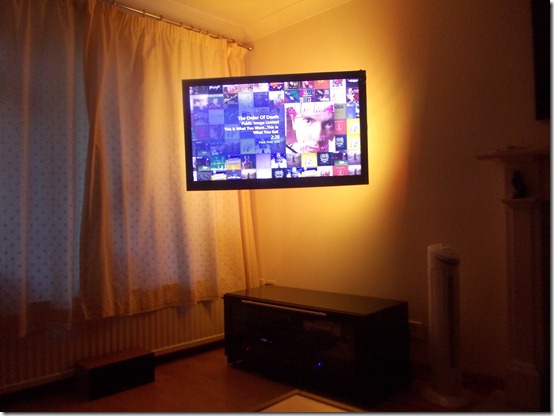
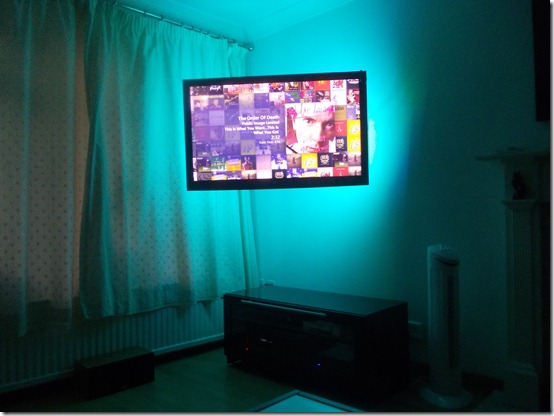
Here are some older photos of the LED mood lighting behind my wall mounted TV

DSCN0656
DSCN0657

Final notes:

In the Fibaro RGBW modules user manual there are many configuration parameters that can be set and configured. However for my working setup here I did NOT add or configure any device parameters. It seems I just didn’t need to do any of that.

The Fibaro RGBW module essensitally replaces the existing LED driver and IR remote that probably came with your LED tape.

However if you are interested in also keeping the IR functionality it may be possible as demonstrated on this German blog here.


Summary

I am very pleased with the Fibaro RGBW module and it has made a welcome addition to my home automation setup. Being able to control the LED mood lighting via your home automation system is much more convenient as I can now control the LED lights with our smart phones and tablets, also we can now incorporate LED lighting controls in to our home automation scenes and schedules.


Friday 5 February 2016

Kodi keyboard shortcuts to run Vera scenes (Windows)

This question came up on the Vera forums, how to use Kodi media center keyboard shortcuts to run scenes in the Vera home automation controller. This is for Kodi Windows users only.

If you wish to do this in Kodi / OpenElec (Linux) then read this article here instead.

Here is a brief overview of the steps required:

Step 1: Create or Edit the Kodi keyboard.xml file to create your desired keyboard shortcuts.

Step 2: Create a pyhton .py script file that Kodi calls when you press your keyboard shortcut in Kodi. In turn the python script calls a Windows .vbs script.

Step 3. Ceate the .vbs script which sends the HTTP command to the Vera controller to run the scene.

The main reason why we use a .vbs script is so we don’t have pop up command windows appearing over the top of the Kodi user interface and the HTTP request will be sent to Vera invisibly in the background.

Step 1: Create or Edit the Kodi keyboard.xml file to create your desired keyboard shortcuts.

The keyboard.xml file should be located in this folder:

C:\Users\Stuart\AppData\Roaming\Kodi\userdata\keymaps

Obviously browse to your own “username” folder what ever that is called, mine is called “Stuart”

If you have an existing keyboard.xml file in this folder then great we can just edit this in a text editor program. I use EditPade Lite7 as my text editor.

If you do not have a keyboard.xml file in this folder, you can download the master keyboard.xml file, to do this right click on this link here and select “Save Link As” (Chrome browser) and save the file Keyboard.xml in to the correct folder.

C:\Users\Username\AppData\Roaming\Kodi\userdata\keymaps

Now open the Keyboard.xml file in with your preferred text editor application.

The file looks like this:

image

Scroll down to the <keyboard> section

image

Hit enter to make a new line

Now this is where we enter our new keyboard shortcut and specify the python script file it should run. In my example here I want my keyboard shortcut to be Ctrl+Alt+A and I want this to run a python script called lounge-on.py

<A mod="ctrl,alt">RunScript(C:\Users\Stuart\AppData\Roaming\Kodi\userdata\Scripts\lounge-on.py)</A>

So now the Keyboard.xml file looks like this, save and close the file.

image

Note: Anytime you edit the keyboard.xml file you need to close and reopen Kodi for the changes to take affect.

Step 2: Create a pyhton .py script file that Kodi calls when you press your keyboard shortcut

Before you start this step ensure you can see file extensions in Windows Explorer.

Now the path I specified in the keyboard.xml file for my python script was:

C:\Users\Stuart\AppData\Roaming\Kodi\userdata\Scripts\lounge-on.py

So in Windows Explorer I need to navigate to the Kodi\Userdata folder and I need to create a new sub-folder called “Scripts”

In here I now need to create a new python .py script file. To do this right click in Windows Explorer and on the menu select New –> Text Document.

image

Then rename the text file in this example I am calling my python script file lounge-on.py

Ensure you have removed the .txt extension and that it now has a .py extension instead.

image

Now right click the new .py file and select to edit it in your text editor.

Paste in this code and change the path as required:

import subprocess
child = subprocess.Popen("wscript C:\Users\Stuart\AppData\Roaming\Kodi\userdata\Scripts\lounge-on.vbs")

So my lounge-on.py file now looks like this:

image

Save and close the python .py script file.

In the python .py script file, we call another .vbs file. I am going to call my lounge-on.vbs.

Step 3. Ceate the .vbs script which sends the HTTP command to the Vera controller to run the scene.

In Windows Explorer in the same folder

C:\Users\Stuart\AppData\Roaming\Kodi\userdata\Scripts\

Right click and from the menu select New –> Text Document

image

Rename the file including the .txt extension to lounge-on.vbs in this example.

image

Now right click the lounge-on.vbs file and edit it in your text editor.

Enter this code:

Dim oXmlHttp
Dim sWebPage

set oXmlHttp = CreateObject("MSXML2.XMLHTTP")

oXmlHttp.open "GET", "http://192.168.1.10:3480/data_request?id=lu_action&serviceId=urn:micasaverde-com:serviceId:HomeAutomationGateway1&action=RunScene&SceneNum=14", false
oXmlHttp.send ""
sWebPage = oXmlHttp.responseText

image

You need to change the IP address to the IP address of your Vera controller and the SceneNum needs to be changed to the scene number you want to run.

Save and close the .vbs file.

Testing

That’s it the setup is completed, now open Kodi and enter your keyboard shortcut, in this example it was Ctrl+Alt+A and your Vera scene should then be run and you should see no command windows popping up over the top of the Kodi user interface.

Running  more scenes

Repeat the process to be able to run more scenes. So for example add a new line in to the keyboard.xml file like:

<B mod="ctrl,alt">RunScript(C:\Users\Stuart\AppData\Roaming\Kodi\userdata\Scripts\lounge-off.py)</B>

image

In this example pressing Ctrl+Alt+B would run a python script file called lounge-off.py

So you would then create the lounge-off.py file and the lounge-off.vbs file etc.

Controlling Vera Devices

You can also use HTTP commands to turn on or off Vera devices, rather than running scenes. For exmaple this HTTP command turns ON my FAN device.

http://192.168.1.10:3480/data_request?id=lu_action&output_format=xml&DeviceNum=50&serviceId=urn:upnp-org:serviceId:SwitchPower1&action=SetTarget&newTargetValue=1

You need to specifiy the correct IP address of your Vera controller and specify the correct device number in DeviceNum=

ON is - SetTarget&newTargetValue=1

OFF is - SetTarget&newTargetValue=0

Summary

This is a fairly easy way to be able to use Kodi keyboard shortcuts to run scenes in Vera and also to be able to control devices in Vera.

In addition you could then go on to program your universal remote control to send these keyboard shortcuts to your Kodi HTPC and you could then run scenes or control devices from your remote control handset via the Kodi HTPC etc.