Google Search

Custom Search

Powered by...

Find us on Facebook

Monday 30 November 2015

Budget Cinema Room Project

Hello and welcome to another blog post. We had a client who wanted a cinema room but on a modest budget. We know that these rooms can cost thousands of pounds but we accepted the challenge and came up with this…..

Before:

before1

before2

before3

As you can see we start with a typical room layout.

In order to be a budget cinema room we discussed with the client about requirements and costs. We then came to an agreement and proceeded to work within the budget.

This was for everything, all materials, amplifier, speakers, lights, Z-Wave Home Automation controller and modules. The only item that wasn’t included was the TV as the client already had their 55” LG TV.

Once the room was cleared we started creating the false ceiling for the speakers and spots and the strip light effects. We also started work on the fake chimney breast as well.

ceiling1

ceiling2

ceiling3

ceiling4

ceiling5

chimney1

ceiling6

Once this was completed we added all the wiring as needed.

ceiling7

The next stage was the boarding up stage.

chimney2

ceiling8

ceiling9

Straight after it was the plastering stage.

chimney3

ceiling10

Once most of the plaster had dried we then measured the ceiling and made all the holes for the speakers and lights.

ceiling11

As part of the budget deal the clients decided they would do all the painting themselves and so we left them to it, which took 2 days to do.

We came back after a week as agreed with the client and then continued with the installation of the lights, speakers and strip lighting. We also added in the Z-Wave Home Automation controller and modules.

ceiling12

ceiling13

Finally we programmed the Z-Wave Home Automation controller and created the scenes and configured the smart phone app and also a handheld keyfob, so that the client can go into “cinema mode” at a touch of a button which turns off the main ceiling lights and turns on the LED colour lighting. Also the client can select a “normal mode” by pressing a different button which turns back on the main ceiling lights and turns off the LED lighting.

Using either the smart phone app or the handheld keyfob the client can select pre-defined LED lighting scenes to choose different colours. See the demonstration video below.

Z-Wave Handheld Keyfob

Smart phone app for RGBW lighting control

Here you can see the finished room, with the ceiling mounted speakers, LED strip lighting in the new false ceiling recess and LED backlighting behind the new false chimney breast. These are RGBW LED lights so the client can pick any colour that suits their mood.

chimney4

Below the wall mounted TV you can see the cabinet for the AV equipment.

chimney5

Here you can see the floor sub-woofer speaker and the AV equipment such as the surround sound amplifier (AVR), SKY TV box, Playstation 4 and a Western Digital media player for movies and TV shows.

Our high-end cinema rooms tend to have a Kodi Home Theatre PC and a Home Storage Server (NAS).

AV-Equipment1

AV-Equipment2

chimney6

chimney7

All in all the client was very pleased with the outcome and happy with everything we had done.

Demonstration Video

Please don’t hesitate to contact us on www.yorkshireautomation.co.uk for FREE no obligation quotation.

Wednesday 25 November 2015

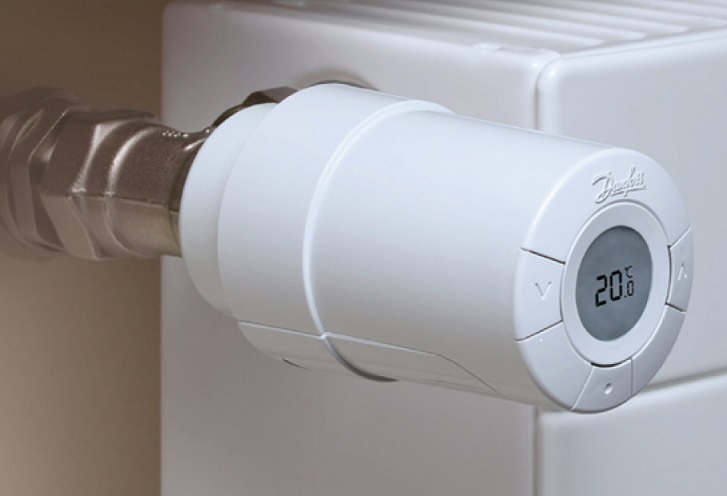
Multi Zone Heating System Using Danfoss Z-Wave TRV

Todays post is about how to create an even more efficient heating system with the use of Danfoss Z-Wave TRV (Thermostatic Radiator Valve)

In your typical home we have a single boiler with multiple radiators and a single thermostat controller which is usually located in the hallway. The biggest problem with this arrangement is that once the temperature has reached the set point in the hallway, that is when the heating will be triggered. This means that even if the rooms are heated up to the the required temperature but the hallway hasn’t, then the boiler will continue to run until the hallway has reached the set point.

We can add traditional TRV to help each room reach a set temperature and this then means the temperature is then normalized throughout the house. This helps to save energy as once the room reaches the desired temperature then the heat supply is shut off and diverted to where it is needed.

These traditional TRV are manually operated valves and once you have set the temperature setting then it will continue to work at that temperature. During a typical day the downstairs is occupied and upstairs is unoccupied. So if the heating is turned on then the whole house will receive the heat from the boiler and start warming up the whole house, so unfortunately the upstairs is also being heated when it is not required. This means wastage.

By adding the Danfoss TRV instead and including them into your Z-Wave home automation network we can program in a schedule setting and adjust the required temperature setting for the upstairs rooms to a lower value during the day and to a higher temperature for the evening as required. This means that we are not wasting energy by heating unwanted rooms of the house.

image

By adding the Danfoss Z-Wave TRV to each radiator we can create a simple multi zone heating system enabling greater control over the temperature of individual rooms within the home.

If you are interested in purchasing home automation products and services contact us for pricing and more details.

Thursday 19 November 2015

Budget Wall Mounted Tablet for Home Automation Control

Here is a cheap little project I did at home, using an old Android tablet I had laying around and a cheap box photo frame and a long white USB cable for powering the tablet. 

I am using the excellent ImperiHome Android app which can be used to control various Z-Wave gateways such as Vera and the Fibaro Home Center 2 and some others. 

With the ImperiHome app I can control all aspects of the home automation system such as lighting, curtains, heating etc however the main use for this wall panel will be for entry and exit. To be able to arm and disarm the house / Z-Wave alarm system. 

ImperiHome has a very useful feature and this is the ability to lock down certain scenes or devices with a pin code. So for example when I press the Welcome Home scene or the Disarm House scene you are prompted to enter a 4 digit pin code like a traditional alarm panel. 

Another nice feature of ImperiHome is the screensaver option, so after a set amount of time, 1 minute in my case the screen will go black / dark.

I have configured the Android tablet to never go to sleep so it will always be on and the WIFI will always be up and running, you just need to tap the screen once to display the ImperiHome app and away you go you can then control the home automation system instantly. 

ImperiHome also has an option to start the app at startup. so if the tablet loses power or is restarted the ImperiHome app will automatically launch again.