
Some time ago I wrote about my Z-wave doorbell project using a Z-Wave.me iTemp device and my existing doorbell chime and push button, see that previous article here for full details.
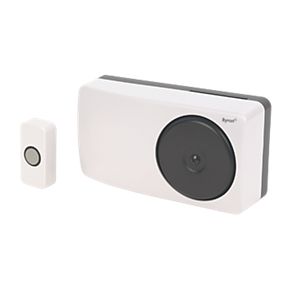
Well that chime and button were really old to begin with and have recently packed in and stopped working. After reading some wired doorbell chime kit reviews on Amazon I decided to purchase a Byron 1217 kit normally around £15 currently only £7.99 at Screwfix here. The user manual for the Byron 1217 unit can be seen here.
Critically this new doorbell chime only takes 2x D type batteries which are 1.5 volts each totalling 3 volts, whereas my old chime unit took 4x D type batteries totalling 6 volts. This meant I had to also purchase a new 3VDC miniature relay as my old relay was rated at 6VDC on the coil.
OMRON ELECTRONIC COMPONENTS G5V-1 3DC RELAY, SPDT, 1A, 3VDC

Miniature coil relay pin out diagram

Here’s how I wired up the new Byron doorbell chime unit to the Z-wave.me iTemp device.
Pins 2 & 9 on the coil relay (no polarity) connected to terminal 2 on the back of the doorbell chime and to the negative terminal of the right hand side battery, at the front of the doorbell chime.

Pins 1 & 5 on the coil relay (no polarity) were then connected to the dry input connector on the Z-Wave iTemp device which you can see in the picture below.
Note: I wouldn’t actually recommend the Z-wave.me iTemp device as it uses batteries far too quickly, instead if you are doing a new Z-wave doorbell project I would recommend using a Fibaro Door and Window sensor and the dry input connector on that device instead.
This time as the Byron 1217 chime unit is much smaller in size than my old one, I mounted the coil relay in a surface mount 1 gang box.

Here you can see the Byron 1217 chime unit. The wire on the right of the chime unit is going off outside to the push button, the wire in the corner of the walls going up, is heading towards the Z-Wave.me iTemp device which is mounted in my living room as it also acts as a temperature sensor.

This time I used a lot smaller and thinner cable running under the ceiling coving heading in to the living room and to the Z-wave.me iTemp device. Last time I used some CAT5 cable which was much thicker.

Here’s the other side of the internal wall in the living room, where the Z-wave.me iTemp device is mounted.

Blanking faceplate installed on the 1 gang surface mount box which contains the coil relay.

Finished installation.

New push button installed outside, the button came with the Byron 1217 doorbell chime kit. The chime doesn’t go ding dong as I thought it might have, it sounds like a bicycle bell and can only be heard for the duration that the button is being held down. However its perfectly fine for the money spent.

OK so now everything was wired up it was time to test it again, looking in the Vera UI my binary contact device was GREEN i.e. not tripped.
Upon pressing the doorbell it changes to RED i.e. now tripped
After a short while the binary contact device should return back to green.


So now what? Well you can now trigger Vera scenes based upon when this binary contact device is tripped. So for example I have added LUUP code in to a doorbell scene to send a popup notification to all the Kodi HTPC’s / TVs in the house, that there is someone at the door, video / audio playback is also paused, also if its night time and the lights are dimmed the lights will automatically brighten up to 100%.
I also have a Logitech Squeezebox (SqueezeLite instance) in the kitchen announce through the kitchen speakers, using Google Text-to-Speech “There is someone at the door”.
Summary
Once you have Z-Wave enabled your existing wired doorbell the possibilities are endless, have a Vera scene send an email notification or send out a SMS text message notification to your phone for example, this could also be integrated in to any front door IP CAM and even send you a picture of who is stood at your door!
Tip - go for a Fibaro door / window sensor rather than a Z-wave.me iTemp and you should be good to go.
If you are interested in purchasing Z-wave Europe home automation products, please contact us directly here for bespoke prices and discounts.
No comments:
Post a Comment